
Taking on a full-house remodel can quickly feel overwhelming when dozens of trades, deliveries, and local permits start overlapping. Homeowners often wonder whether to begin with aesthetic upgrades inside or tackle pressing structural items on the outside first. Without a clear master plan, sequence errors can cause expensive rework, such as ruining a fresh coat of wall paint during a rewiring project or damaging brand new wood flooring during an exterior drainage repair. Establishing a logical order of operations keeps the project moving smoothly, protects every financial investment, and ensures that early construction phases properly support whatever comes later.
A successful renovation schedule moves from the ground up and from the outside in. Before choosing custom cabinet styles, tile backsplashes, or wall colors, the physical structure must be completely stable, dry, and weather-tight. Soil stabilization, water management, framing repairs, and roof fixes always take precedence because moisture intrusion can ruin new insulation, drywall, woodwork, and floor coverings in a single sudden rainstorm. Once the home is weatherproof, tradespeople can step inside to reconfigure floor plans, modernize mechanical infrastructure, and hang fresh wall panels.
Only after the outer envelope and utility systems are fully secured should decorative elements take center stage. Skipping ahead to cosmetic upgrades might offer fast visual satisfaction, but it invites long-term structural and financial headaches. Following a proven phase-by-phase schedule allows property owners to manage project cash flow, coordinate subcontractors efficiently, and execute a comprehensive home transformation with confidence. Investing the time upfront to understand how construction phases depend on one another pays off in fewer unexpected change orders, lower overall labor expenses, and a home built to perform reliably for decades. Careful planning eliminates unnecessary delays, keeps municipal inspectors satisfied, and keeps overall timelines predictable throughout the construction journey. Adhering to a clear schedule prevents costly missteps.
Phase 1: Structural Integrity and Substructure Stabilization
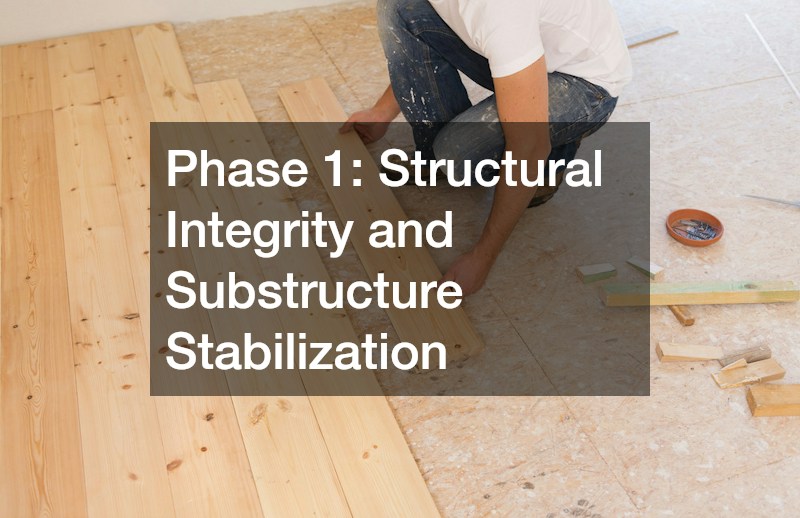
Every long-lasting renovation project begins in the ground beneath the main structure. Soil movement, seasonal freeze-thaw cycles, and inadequate rainwater drainage can compromise a home over time, causing sagging floor joists, sticking doors, diagonal drywall cracks, and unlevel floors throughout upper levels. Attempting to execute fine interior finish work while the building framing continues to shift is a recipe for wasted capital, as underlying structural movement will quickly crack new plaster, pop trim joints, and misalign custom cabinetry.
Before any framing modifications, insulation, or decorative work can begin, structural engineers and specialty contractors must inspect the footings, rim joists, sill plates, and support posts. When shifting soil or water accumulation has damaged basement walls or crawl space piers, property owners should immediately schedule professional foundation repair services to stabilize the base. Leveling and reinforcing the substructure early protects all subsequent work, ensuring that new door frames, interior partitions, and custom cabinetry stay square and true throughout the life of the building.
At the same time, managing roof runoff is essential to keeping the newly reinforced base dry. Clogged or undersized gutter channels spill thousands of gallons of rainwater directly along the exterior perimeter, undercutting soil stability and seeping through concrete walls into lower living spaces. Fitting high-capacity gutter guards keeps drainage paths completely clear of leaves and debris, ensuring that heavy rainfall is directed safely away from the building rather than pooling around structural footings. Resolving these core structural and drainage issues creates a solid foundation that supports every future renovation phase without risking future water intrusion. Timely intervention safeguards structural stability early.
Phase 2: Weatherproofing the Building Envelope

Once the structural base is solid, attention shifts directly to the exterior building envelope. The outer shell acts as the primary barrier against rain, driving wind, extreme temperature swings, and outdoor humidity. Opening up interior walls while the exterior cladding remains leaky or drafty invites water intrusion and hidden mold growth, which can ruin new wall insulation and framing before interior work is even finished. Securing the envelope first guarantees that interior materials remain completely dry throughout the remodeling process.
Upgrading worn or outdated wall cladding is a vital step in sealing the structure. Utilizing modern siding replacement services provides the building with advanced weather-resistant barriers, rigid exterior insulation, and durable finish materials that lock out moisture. This upgrade dramatically improves the building thermal performance, reduces monthly energy bills, and ensures that interior wall cavities stay thoroughly dry during seasonal storms. Modern cladding materials also offer enhanced impact resistance and minimal upkeep for years to come.
In conjunction with new wall cladding, old or single-pane window units should be addressed to finalize the exterior envelope. Installing energy-efficient replacement windows eliminates drafty air leaks and moisture infiltration while establishing a tight weather seal around every wall opening. Executing window and cladding projects together allows installers to integrate flashings and weather barriers seamlessly, creating a continuous protective layer across the outer structure. Once the building is fully sealed from the weather, interior trades can work continuously without fear of rain delays, moisture damage, or indoor climate fluctuations. Weatherproofing protects vulnerable building components.
Phase 3: Outdoor Property Grading and Exterior Living
With the home sealed against weather, exterior site work can expand into the surrounding yard and outdoor living zones. Heavy machinery used for excavation, land clearing, and concrete pouring can disturb topsoil and alter natural water drainage patterns, so this work must happen before delicate garden beds or sod are installed. Proper site grading ensures that surface water glides smoothly away from the main building rather than collecting near the perimeter. Establishing a positive slope across the yard protects both new and existing structural elements.
Building structured outdoor living areas involves laying stone paver patios, constructing retaining walls, and establishing walkways. Scheduling heavy hardscaping services during this phase permits construction equipment to move freely across the property without damaging manicured lawns or decorative plantings. These structural stone and concrete features also serve functional purposes by holding steep slopes in place and directing surface water runoff directly into dedicated drainage channels. Proper staging of material piles during this stage prevents soil compaction near mature tree roots.
After all heavy stonework, concrete pouring, and site grading are wrapped up, soft outdoor features can be added. A thoughtful landscaping design incorporates native trees, ornamental shrubs, ground cover, and fresh sod to anchor loose soil and frame the home’s updated profile. Planting root systems around newly constructed retaining walls and walkways prevents soil erosion during heavy rains, adding a vibrant and protective final touch to the property’s exterior environment. Completing outdoor living spaces gives homeowners functional exterior areas to enjoy while indoor renovation phases progress. Proper drainage design maintains long-term grounds performance.
Phase 4: Rough Interiors, Layout Changes, and Mechanical Systems
Once the exterior envelope is weatherproofed and site drainage is controlled, construction moves indoors for structural and mechanical rough-ins. This stage involves removing non-load-bearing walls, reconfiguring room layouts, and installing new utility lines. Electricians, plumbers, and heating technicians require complete access to open wall studs and floor joists to run updated wiring, supply piping, drain lines, and ventilation ductwork. Coordinating these trades efficiently prevents overlapping schedules and keeps mechanical work moving forward smoothly.
Complex space updates, such as a major kitchen renovation, require extensive utility relocations, upgraded electrical subpanels, and customized exhaust ducting. Demolishing old cabinetry, moving plumbing stacks, and pulling new electrical circuits must occur long before drywall is hung or surface finishes are applied. Attempting to install new appliances or plumbing fixtures without modernizing underlying mechanical systems leads to code violations and expensive tear-outs. Proper mechanical rough-in work ensures that all appliances operate safely and efficiently for years to come.
Following rough-in municipal inspections, insulation is packed into wall cavities, and drywall panels are installed throughout the house. Hanging, taping, floating, and sanding drywall generates substantial fine dust, making this one of the messiest phases of a whole-home project. Contractors should seal off door openings with plastic sheeting and run temporary air filtration units to keep dust from settling in freshly installed ductwork or spreading to completed areas. Proper drying time between drywall tape coats yields flawless surfaces ready for fine interior finishes. Thorough inspections protect essential mechanical upgrades.
Phase 5: Interior Millwork, Cabinetry, and Hard Surfaces

With smooth, primed drywall panels in place, the renovation shifts from heavy construction to fine interior carpentry and fixture installation. This phase introduces custom millwork, built-in storage, and durable working surfaces that define the home’s daily functionality. Installing interior doors, window casings, baseboards, and wall paneling establishes clean architectural lines across every room. Completing trim installations before cabinetry ensures that baseboards fit tightly against adjoining surfaces without unsightly gaps.
When custom cabinets are securely anchored to wall framing, precise fabrication measurements are taken for working surfaces. Ordering and installing a custom countertop crafted from quartz, granite, or solid composite material requires perfectly level cabinet boxes and skilled handling during delivery. Completing heavy surface installations before applying final wall paint prevents accidental scuffs or scratches along cabinet faces and adjacent walls. Professional installers ensure that seam placements remain subtle and structural support brackets are properly concealed beneath overhangs.
With cabinetry and hard surfaces secured, tile backsplashes, accent walls, and secondary trim work can be completed. Tiling requires wet saws and grout mixing, which should happen before fine wall finishes and soft flooring are in place. Proper surface preparation during this phase guarantees that tile lines are straight, grout joints are sealed, and all horizontal surfaces are protected with heavy builder paper before painters begin their work. Taking care during this stage creates a clean transition into final surface coatings. Precise trim fitting creates seamless visual transitions.
Phase 6: Professional Painting and Surface Finishing

After millwork, cabinetry, and hard surfaces are locked into place, wall preparation and coating become the primary focus. High-quality paint finishes require diligent surface preparation, including patching nail holes, sanding drywall compound smooth, applying stain-blocking primer, and caulk-sealing trim joints. Skipping thorough prep work guarantees that minor wall imperfections will show through the final finish coats. Clean, prepped surfaces allow paint formulas to adhere evenly and resist peeling over time.
Partnering with professional local interior painting contractors ensures crisp trim lines, smooth wall coats, and uniform coverage across high ceilings and detailed woodwork. Experienced painting crews understand how to select moisture-resistant paints for bathrooms and kitchens while using washable, low-sheen formulas for high-traffic hallways and living areas. Professional painters also mask built-in cabinets, counters, and window frames meticulously to protect expensive finishes from overspray or drips. Their expertise turns primed drywall into vibrant, light-reflecting living spaces.
Once wall and trim painting is complete, light fixtures, electrical cover plates, ceiling fans, and plumbing trim can be mounted. Installing decorative switch plates and hanging chandelier fixtures after painting avoids awkward cut-ins around hardware. At this stage, the interior spaces take on a polished, cohesive look, setting the stage for the final decorative details and soft flooring installations. Proper ventilation during painting helps accelerate cure times and keeps indoor air fresh for upcoming flooring crews. Proper drying intervals promote durable paint adhesion.
Phase 7: Soft Flooring, Final Fixtures, and Walkthroughs
The final phase of a whole-home remodeling project focuses on soft floor coverings, hardware installations, and detailed punch list walkthroughs. Flooring materials that are susceptible to staining, snagging, or moisture damage should always be installed as late as possible. Delaying floor placement prevents damage caused by heavy trade boots, falling tools, or moving ladders during earlier construction stages. Protecting new floor materials ensures that the finished interior looks immaculate on move-in day.
Installing plush carpet across bedrooms, upper-level hallways, and living spaces adds immediate thermal insulation and acoustic comfort to the home. Because synthetic and wool fibers easily trap fine drywall dust, wood shavings, and paint droplets, floor installers should only work after all painting, trim work, and overhead fixture installations are fully completed. Vacuuming thoroughly immediately after rolling and stretching the material keeps the room dust-free and ready for furniture placement. Quality padding beneath soft flooring enhances foot comfort and extends material lifespan.
With all construction work completed, a specialized cleaning crew should perform a top-to-bottom deep clean, wiping down glass, washing cabinetry, and sanitizing all surfaces. The property owner and general contractor then conduct a final walkthrough to create a punch list for minor touch-ups, cabinet hinge adjustments, or hardware tweaks. Following this disciplined order of operations transforms a complex multi-stage renovation into a seamless, rewarding project that provides long-term value and daily enjoyment. A systematically remodeled home stands ready to deliver comfort, security, and aesthetic beauty for generations. Systematic completion guarantees a smooth move-in experience.