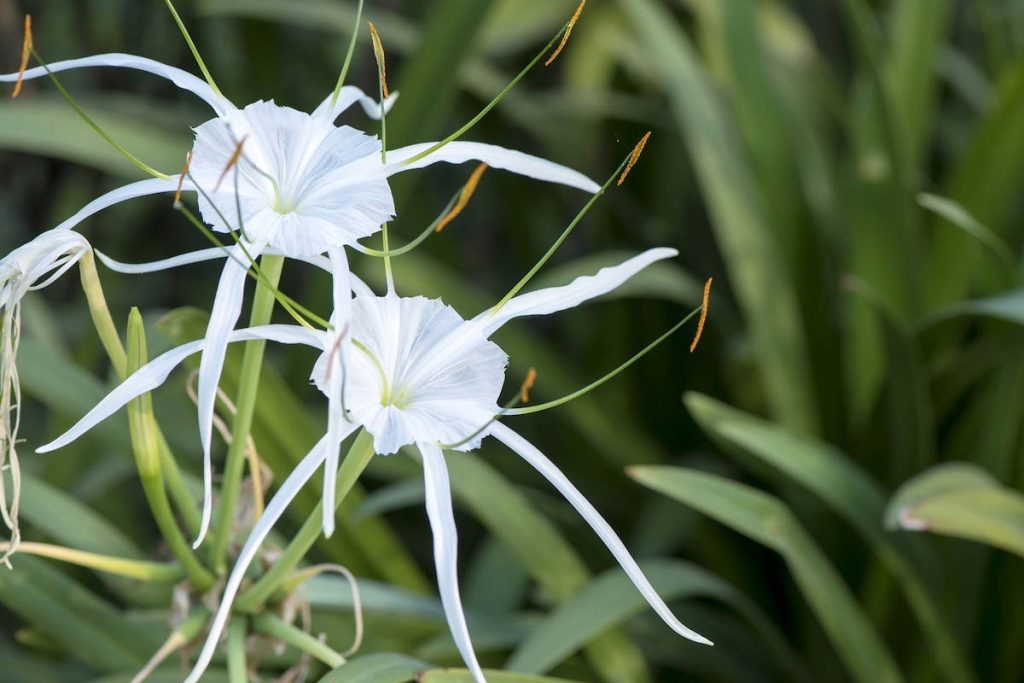
Elegant, pristine white flowers make it easy to grow indoors as a not-so-popular member of the Amaryllis family – this spidery blossom has long slender segments that radiate from the center giving its whole flower an intriguing look like no other. The beauty and intrigue of the Spider Lily flowers are unmatched by any other bloom.
Why Spider Lilies is a Good Choice
Spider Lily flowers, or lycoris radiata, come from plants that bloom in the summer. They are beautiful perennial plants found living naturally near ponds, lakes, and slow streams.
So why would you want to grow spider lilies inside? You may want to grow them because they are easy to care for, have exotic blooms, and come in many different varieties. Planting spider lilies are also a good way to bring the outdoors to your home.
Spider lilies are relatively trouble-free because they are easy to grow. All you have to do if your plant is drooping or wilting is give it more water.
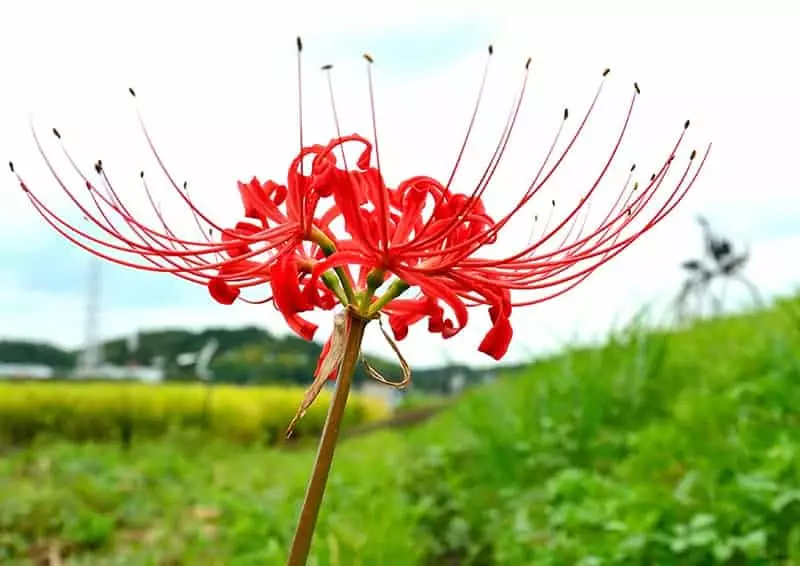
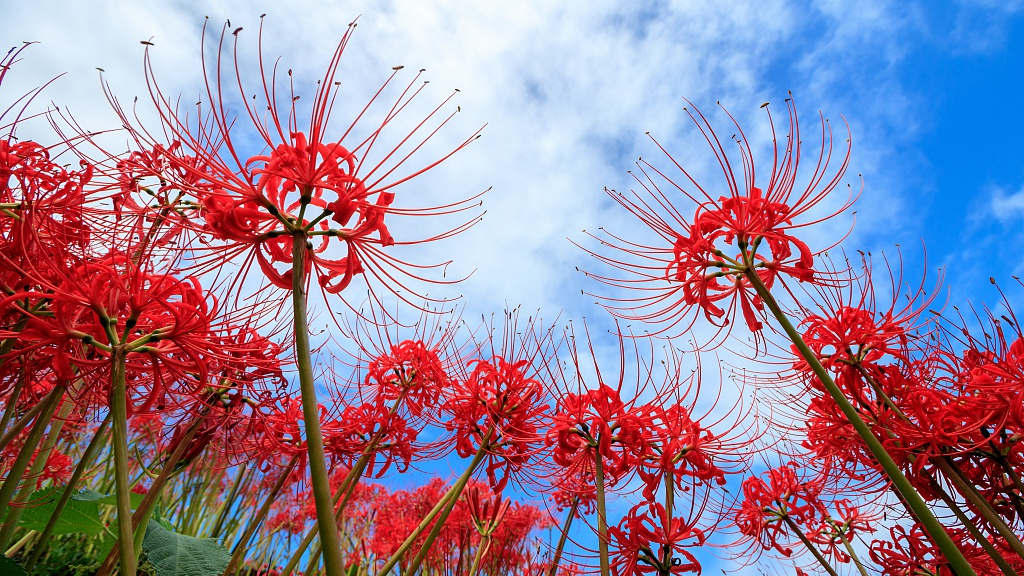
They come in colors such as white, light cream, red, and yellowish-white with red tips and stripes inside. There are even black ones sometimes found at plant shops but the red spider lily is the most common and popular out of all varieties.
If you plan on using them as decorations, take a look at some pictures first before choosing which ones you want to purchase.
How to Grow Spider Lilies
There are more than twenty varieties of spider lilies and all varieties grow from bulbs. They don’t need much attention because they grow easily, so plant them and forget about them and they will multiply into a garden of flowers in the years to come.
But just to be sure, here’s a list of things you need to do in order to plant and grow spider lilies properly.
-
Plant the bulbs
First on the list is learning how to plant spider lily bulbs. It’s fairly easy as you only need to dig a hole in an area that receives plenty of sunlight and make sure it’s big enough for all of your bulbs (note that bulbs should be planted about 6 inches apart). Fill the hole with fertilizer, then add topsoil up to 1/4 inch from ground level. Mix soil thoroughly.
-
Prepare the stem
Twist off the green portion of the stem once it appears dead after winter has passed, usually about the middle of March or April.
-
Put the bulb together
Create a hole in the soil using your index finger with the pointed part of your finger facing away from your body. Place one end of the bulb in this hole, then arrange the rest of the stem around it. Make sure that all parts are facing up (this is when you will see each flower emerge). When done, dust with fertilizer and cover with topsoil again.
-
Plant the stems
Once all bulbs have been put together, use something like a stick or spade to gently press down on them (be careful not to break any stems). Then push some extra soil around them; you don’t want to disturb them later on. They should be planted about 1 foot apart.
-
Reap the benefits
By now, you should have seen some of your stems start to flower! Once they are in full bloom, cut off the flowering part of the stem and dust with fertilizer before watering regularly. Make sure that there is lots of sunlight when they are in their flowering stage—this will keep them growing bigger and better.
Choosing Where to Plant Your Spider Lilies
There are a few things that you need to take into consideration before planting your Spider Lilies.
The first thing to consider when planting these plants is sun exposure. They like shade but they do require some direct sunlight, otherwise, their leaves will begin to turn yellow and die. You don’t want this to happen because the leaves will take a lot of energy from the bulb.
The second thing to consider is temperature. Spider Lilies like it to be cooler rather than warmer. So if you’re living in a tropical climate, then planting them directly outside your house might not be such a good idea because they can get too warm and die off faster.
A great place to plant your bulbs instead would be under a tree or near a building where the wind can help cool the flowers down when needed. Finally, since these plants do well with partial sun exposure, placing them in a location where they have protection from direct sunlight as it will prolong their life and promote blooming earlier in the season.
What type of soil should be used?
When deciding on what type of soil you want to use to plant your bulbs, it’s important to take into consideration what you will be cultivating in the soil.
If you have a garden that has heavier clay-type soil, then adding sand or other elements that are more porous would be a good idea because this allows for better drainage during droughts and helps maintain the plant’s health.
This is also true for water exposure as well. Spider lilies prefer wetter soils which means they need to be planted near a source of water such as a pond or even from you watering your lawn or garden with sprinklers.
The key here is the frequency of how often your flowers will need these conditions met.
You can also use organic composted cow manure and peat moss to fill your planters which work wonders for Spider Lilies.
Something else to consider is to check your local ordinances in your area because, in some places, you are not allowed to plant certain types of bulbs in the ground which can be easily solved by putting the bulbs in a pot instead.
If you’re planting these directly under trees or large shrubs, then an issue that could arise is running out of space. So if this happens, try digging down at least two feet deep around where the original bulb was planted and adding more composted manure mixed with peat moss (half/half). This will help give them enough nutrients for their next set of leaves to grow big and strong.
Once it comes time for planting, make sure that you place them about six inches deep in the soil. At this point, it’s a good idea to mix the organic composted manure thoroughly with the earth and cover it back up with a thin layer of leaves or straw so that the bulb won’t be exposed to any direct sunlight for a few days.
Once it starts sprouting, take away those previous layers so that it can have enough space to grow big and strong over time.
If you follow these recommendations then your Spider Lilies will thrive.
How to Propagate Spider Lilies
Spider lilies are attractive, but they are hard to find for sale. Fortunately, it is easy to propagate them yourself.
Spider lily bulbs produce two types of roots: feeder roots and storage roots.
Feeder roots grow into the soil to absorb water and nutrients. Meanwhile, storage roots grow into the soil to store food for replanting. The roots that a spider lily produces depend on how it was grown, and this varies between bulbs grown from seed versus those grown from a bulb division.
Propagating Spider Lilies by Growing from Seed
If you’re interested in propagating spider lilies from seed, the process is simple. Spider lilies that are grown from seed produce mostly feeder roots, so you’ll need a container with good drainage.
Fill a plastic nursery pot with bulb-mix potting soil and place the seedlings about 1 inch apart. Keep the soil moist until shoots appear, but don’t use liquid fertilizer – it’s too soon to tell which roots will be feeder roots or storage roots. The seedlings should bloom the following year.
Propagating Spider Lilies by Division
If you’re interested in propagating spider lilies from division, as opposed to growing from seed, you’ll need a container with good drainage and sharp pruning shears. In early spring – before growth starts – divide spider lilies.
Carefully separate the feeder roots from the storage roots, keeping as much soil around the roots as possible. Discard any dried-out rhizomes and damaged roots, and replant immediately in a container filled with bulb mix potting soil.
Water well after planting to settle the soil around each rhizome and keep the planting moist until shoots appear. Once the shoots appear, begin fertilizing with a liquid 20-20-20 fertilizer once every two weeks.
Spider lilies can take up to a year and a half to begin flowering again if given the right conditions. Be patient and you will soon have many new spider lilies growing in your garden.
How Do You Take Care of a Spider Lily?
If you’re new to gardening or haven’t been successful at gardening in the past then Spider Lilies would be a good way to start or restart your gardening adventure. Although spider lilies are easy to care for and are pest-resistant, it’s still a garden plant that you need to properly care for them if you want them to bloom beautifully.
Remember to water them moderately during the growing season. They need a lot of water as they’re growing. This is usually from spring until fall. Then, during the fall or winter months, switch to watering only every two weeks.
When the leaves start to wither in the summer, withhold water and let the soil go dry.
Remove the leaves once they’re yellow and withered. Then, remove the stems once your lilies are done blooming. But keep the bulbs underground if you want them to come back next year.
Safety Tips When Handling Spider Lilies
Note that spider lily bulbs are considered poisonous for humans if ingested. They can produce a variety of symptoms such as abdominal pain, vomiting and vision loss.
However, they have been used to treat a number of ailments across Asia including reducing phlegm in colds.
Their leaves are known to be poisonous, so take care not to handle them without gloves or get sap on your skin. The sap is known to cause pain and burning in the eyes of people who come into contact with it.
Keep spider lilies away from pets and children by placing them in an area that is out of reach.